
Riverthames Collection
"Exploring the Rich History of River Thames: A Glimpse into London's Past" Step back in time and immerse yourself in the captivating history of River Thames


All Professionally Made to Order for Quick Shipping
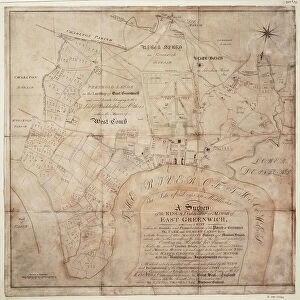
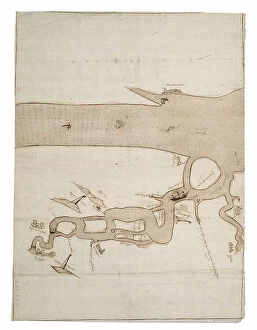
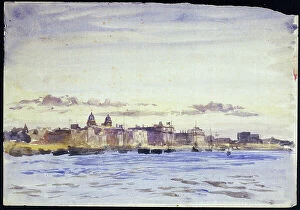
"Exploring the Rich History of River Thames: A Glimpse into London's Past" Step back in time and immerse yourself in the captivating history of River Thames, as depicted through various artworks and engineering marvels. The painting "Alone in London, c. 1894" transports us to a bygone era, where we can almost feel the serenity of the river flowing beneath our feet. The 19th century was a period of great innovation, symbolized by the introduction of high-pressure steam engines and elevations along the river. These technological advancements revolutionized transportation and paved the way for progress. One such testament to this progress is captured in "Maidenhead Bridge over the Thames, Great Western Railway, " a lithograph that showcases how railways transformed connectivity across regions. Similarly, "View of Viaduct of Proposed Great Western Railway" offers an intriguing glimpse into ambitious plans that shaped London's landscape during 1835-38. Delving deeper into historical sketches like "Windsor Station, 1849, " we witness meticulous pencil strokes bringing architectural wonders to life. This artwork serves as a reminder of how railway stations became bustling hubs connecting people from all walks of life. Venturing underground reveals another fascinating aspect – tunneling endeavors beneath River Thames. The watercolor depiction titled "A wash view of the shield" highlights early attempts at constructing tunnels using innovative techniques around 1818-39. Detailed pen-and-ink sketches like "Timbering for removal of old shield" provide insight into laborious processes involved in these ventures. The monumental achievement known as Thames Tunnel comes alive through mesmerizing watercolors such as "Longitudinal section showing Rotherhithe shaft with first section constructed. " These illustrations showcase not only technical prowess but also highlight challenges faced during its creation. Further exploration leads us to captivating pieces like "Cylindrical tunnelling shield with crank, " which reveal intricate designs employed in tunneling machinery.