Fraud Blocker Skip to main content

Home > Historic > Battles > Related Images

Related Images Collection (#9)

49,984 Items

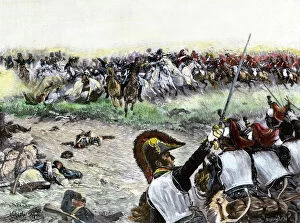
Background imageRelated Images Collection: Battle of Waterloo, 1815

Battle of Waterloo, 1815
Cavalry charge during Napoleons final battle at Waterloo, 1815. Hand-colored engraving of a 19th-century illustration

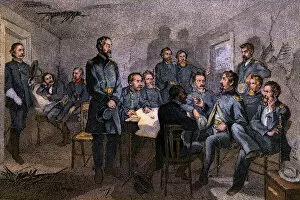
Background imageRelated Images Collection: General Meades council of war at Gettysburg

General Meades council of war at Gettysburg
Union generals discuss strategy before the Battle of Gettysburg, July 1863. Hand-colored engraving of a 19th-century illustration

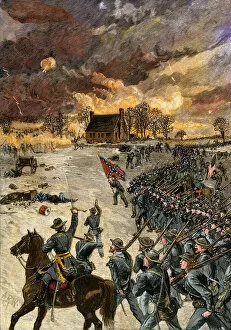
Background imageRelated Images Collection: Battle of Chancellorsville, 1863

Battle of Chancellorsville, 1863
General Stonewall Jackson leading the Confederates at Chancellorsville, 1863. Hand-colored woodcut of a 19th-century illustration

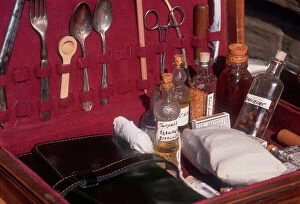
Background imageRelated Images Collection: Medical kit in the Civil War, 1860s

Medical kit in the Civil War, 1860s
Civil War medical kit used in field situations, Shiloh Battlefield. Photograph

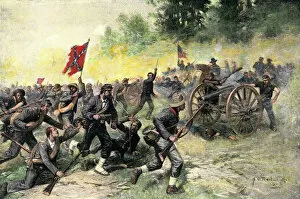
Background imageRelated Images Collection: EVCW2A-00080

EVCW2A-00080
Confederate charge up Little Round Top, held by the 20th Maine Regiment, Battle of Gettysburg, 1863. Hand-colored halftone of a 19th century illustration

Background imageRelated Images Collection: Battle of Munfordville, Kentucky, Civil War

Battle of Munfordville, Kentucky, Civil War
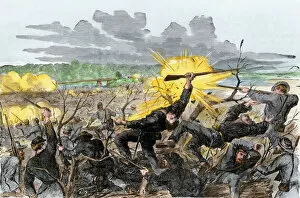
Confederates charging Union fortifications at Munfordville, Kentucky, 1862. Hand-colored woodcut of a 19th-century illustration

Background imageRelated Images Collection: Battle of the Wilderness, Civil War, 1864

Battle of the Wilderness, Civil War, 1864
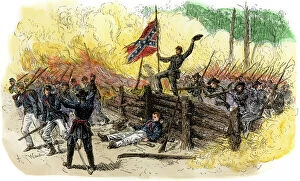
Confederates capturing Union breastworks during the Battle of the Wilderness in Virginia, 1864. Hand-colored woodcut of a 19th-century illustration

Background imageRelated Images Collection: Irish Brigade memorial on Little Round Top, Gettysburg battlefield

Irish Brigade memorial on Little Round Top, Gettysburg battlefield
Irish wolfhound on the monument to NYs Irish Brigade, Little Round Top, Gettysburg Battlefield. Photograph

Background imageRelated Images Collection: Mongol soldiers demonstrating their horsemanship

Mongol soldiers demonstrating their horsemanship
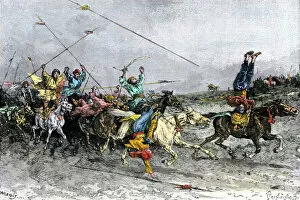
Mongol warriors showing their horsemanship to the Chinese forces of Hung-Wu. Hand-colored woodcut of a 19th-century illustration

Background imageRelated Images Collection: EVRV2A-00048

EVRV2A-00048
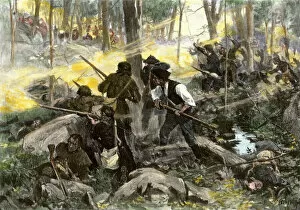
Battle of Kings Mountain, South Carolina, 1780, American Revolution. Hand-colored halftone illustration of a 19th-century illustration by F.C. Yohn

Background imageRelated Images Collection: British Rocket Troop J840006

British Rocket Troop J840006
Engraving of British Napoleonic soldiers produced in London. Royal Horse Artillery Rocket Troop (Review Order). In 1815 at the Battle of Waterloo

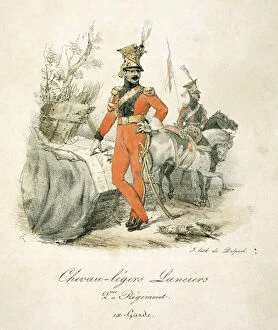
Background imageRelated Images Collection: French Lancers J840002

French Lancers J840002
Engraving of French Napoleonic soldiers. An Officer of the Chevaux-legers Lanciers (2nd Regiment of Imperial Guard), with a mounted private in the background

Background imageRelated Images Collection: Pieneman - Field Marshal Lord James Somerset N070464

Pieneman - Field Marshal Lord James Somerset N070464
APSLEY HOUSE, London. Field Marshal Lord Fitzroy James Henry Somerset (1788-1855), later 1st Baron Raglan by Jan Willem PIENEMAN in 1821 (WM 1486-1948)

Background imageRelated Images Collection: Pieneman - Lieutenant-Colonel William Thornhill N070460

Pieneman - Lieutenant-Colonel William Thornhill N070460
APSLEY HOUSE, London. Lieutenant-Colonel William Thornhill sketched by Jan Willem PIENEMAN in 1821 (WM 1482-1948). In 1815 at the Battle of Waterloo, Major Thornhill was Aide-de-Camp to General Paget

Background imageRelated Images Collection: Pieneman - General Sir George Cooke N070456

Pieneman - General Sir George Cooke N070456
APSLEY HOUSE, London. General Sir George Cooke (1768-1837) sketched by Jan Willem PIENEMAN in 1821 (WM 1478-1948). In 1815 at the Battle of Waterloo

Background imageRelated Images Collection: Pieneman - Field Marshal Sir John Colborne N070453

Pieneman - Field Marshal Sir John Colborne N070453
APSLEY HOUSE, London. Field Marshal Sir John Colborne (1778-1863; created First Baron Seaton in 1839) sketched by Jan Willem PIENEMAN in 1821 (WM 1475-1948)

Background imageRelated Images Collection: Battle of Flodden Field J970041

Battle of Flodden Field J970041
BATTLE OF FLODDEN FIELD, Northumberland. Reconstruction drawing of the Battle of Flodden, 1513 by Ivan LAPPER

Background imageRelated Images Collection: Battle instructions written by the Duke of Wellington K050231

Battle instructions written by the Duke of Wellington K050231
APSLEY HOUSE, London. Battle instructions written by the Duke of Wellington

Background imageRelated Images Collection: Horatio, Lord Nelson

Horatio, Lord Nelson
Circular portrait of legendary British naval commander Horatio, Lord Nelson (1758 - 1805) surrounded by scenes depicting his death on the deck of the flagship HMS Victory

Background imageRelated Images Collection: Poster showing details of the ME109 Messerschmitt

Poster showing details of the ME109 Messerschmitt
English poster showing details of the ME109 German Messerschmitt fighter plane, used during the Second World War

Background imageRelated Images Collection: Battle of Vimy Ridge 1917

Battle of Vimy Ridge 1917
Scene on newly won ground near Feuchy crossroads during the Battle of Arras. 18 pounders in the open, infantry coming down and a tank going up

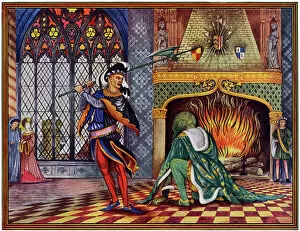
Background imageRelated Images Collection: Sir Gawain and the Green Knight by William McLaren

Sir Gawain and the Green Knight by William McLaren
Sir Gawain takes up the challenge. As instructed by the Green Knight, he swings the battleaxe and cuts off the Green Knights head. The head falls off and rolls towards the banqueting guests

Background imageRelated Images Collection: Interior of Nelsons flagship, H. M. S. Victory at Trafalgar

Interior of Nelsons flagship, H. M. S. Victory at Trafalgar
This is a sectional drawing of the interior of H.M.S. Victory, Nelsons flagship. It shows how the Victory was fought at the Battle of Trafalgar in 1805

Background imageRelated Images Collection: RAF Bombers over Berlin; Second World War, 1943

RAF Bombers over Berlin; Second World War, 1943
Illustration showing Royal Air Force bombers heading towards their target of Berlin during the Spring of 1943. This drawing shows several types of German anti-aircraft defences which were new to

Background imageRelated Images Collection: The Zulu war. Scene of the Battle of Isandula (Isandhlwana)

The Zulu war. Scene of the Battle of Isandula (Isandhlwana)
After the Battle of Isadhlwana. A description by Lieutenant Crealock reads, Day waned and the night hung over the hill, when we reached the last ridge, beyond which lay what had been our camp

Background imageRelated Images Collection: The Zulu war. Lord Chelmsfords retreat from Isandhlwana the

The Zulu war. Lord Chelmsfords retreat from Isandhlwana the
Lord Chelmsford surveying the damage after the Battle of Isandlwana. The battlefield strewn with corpses is in the foreground, Isandhlawana Hill is in the distance, as are the Zulu impi (warriors)

Background imageRelated Images Collection: John, Bonny Dundee

John, Bonny Dundee
JOHN GRAHAM of Claverhouse, viscount DUNDEE (k.a. Bonny Dundee) a Scottish hero through his support for the Stuart cause, but will die at the battle of Killiecrankie

Background imageRelated Images Collection: Battle of Agincourt

Battle of Agincourt
A cavalry charge during the English victory at Agincourt

Background imageRelated Images Collection: Westbury White Horse

Westbury White Horse
On the Downs at Westbury, Wilts is this Great White Horse commemorating the defeat of the Danes by Alfred at the Battle of Ethandune in 878

Background imageRelated Images Collection: Death of King Harold showing an arrow in his eye, Bayeux Tapestry, Bayeux

Death of King Harold showing an arrow in his eye, Bayeux Tapestry, Bayeux, Normandy, France, Europe

Background imageRelated Images Collection: Blue Diamonds Hunters and a Spitfire

Blue Diamonds Hunters and a Spitfire
Hawker Hunters of 92 Squadron Blue Diamonds display team with Supermarine Spitfire Vb of the RAF Battle of Britain Memorial Flight, SBAC Show, Farnborough

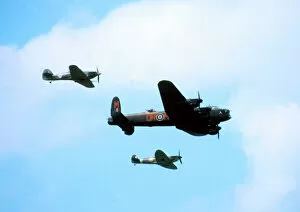
Background imageRelated Images Collection: Battle of Britain Flypast

Battle of Britain Flypast
battle of britain flypast avro lancaster spitfire hurrican slickshoots fbro 02

Background imageRelated Images Collection: River Thames, Tower Bridge and HMS Belfast, London, England, UK, Europe

River Thames, Tower Bridge and HMS Belfast, London, England, UK, Europe

Background imageRelated Images Collection: William the Conqueror J980082

William the Conqueror J980082
BATTLE ABBEY, East Sussex. " William the Conqueror" c1580 by unknown artist. Oil on panel 146.1 x 109.2

Background imageRelated Images Collection: Flodden Field K940715

Flodden Field K940715
FLODDEN FIELD, Northumberland. Site of battle of 1513. Memorial cross

Background imageRelated Images Collection: A Legendary Clash: Rangers vs Aberdeen at Ibrox - Paul Gascoigne's Epic Battle

A Legendary Clash: Rangers vs Aberdeen at Ibrox - Paul Gascoigne's Epic Battle
Paul Gascoigne, Rangers

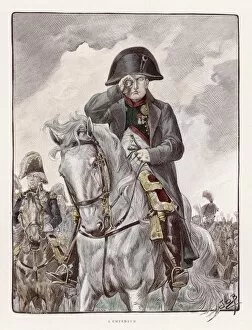
Background imageRelated Images Collection: Napoleon and Spyglass

Napoleon and Spyglass
Mounted on his horse Marengo, He watches the progress of a battle with the aid of a spy- glass

Background imageRelated Images Collection: Koniggratz Battle 1866

Koniggratz Battle 1866
BATTLE OF KOENIGGRATZ (also known as Sadowa) The Prussian victory, though hard- won, leads to Austrian collapse, victory for Prussia, and the creation of the German Empire

Background imageRelated Images Collection: Battle of Adowa

Battle of Adowa
The Battle of Adowa in which Meneliks Ethiopian forces defeated the Italians; Brigadier General Dabormidas troops encounter fierce resistance

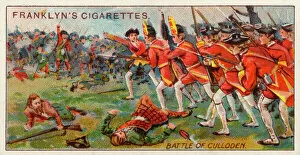
Background imageRelated Images Collection: Battle of Culloden

Battle of Culloden
The final charge of the Royal troops, commanded by the duke of Cumberland, leading to total victory over the forces of the Young Pretender

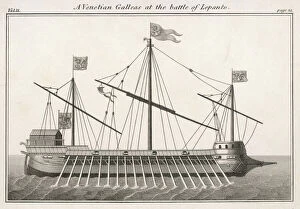
Background imageRelated Images Collection: Venetian Galley 1570

Venetian Galley 1570
A Venetian Galley (Galleas) at the time of the Battle of Lepanto (1571)

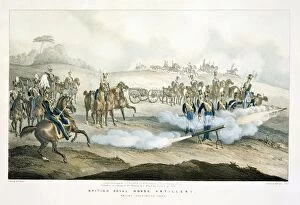
Background imageRelated Images Collection: Royal Horse Artillery

Royal Horse Artillery
British Royal Horse Artillery in action, 19th century

Background imageRelated Images Collection: Celtic chariot J950023

Celtic chariot J950023
Reconstruction drawing of a horse drawn Celtic chariot and charioteer in Iron Age Britain by Chris Evans (English Heritage Graphics Team)

Background imageRelated Images Collection: Battle of Hastings J000018

Battle of Hastings J000018
BATTLE ABBEY, East Sussex. Battle of Hastings reconstruction drawing by Peter Dunn, English Heritage Graphics Team. William pushes his helmet back to show troops he is alive

Background imageRelated Images Collection: Colorful Medieval Bayeux tapestry, Bayeux, Normandy, France. Created 11th century right after

Colorful Medieval Bayeux tapestry, Bayeux, Normandy, France. Created 11th century right after Battle of Hastings 1066 AD showing Norman Conquest. Shows Battle and deaths in lower panel

Background imageRelated Images Collection: Sea Port at Sunset, 1639 (oil on canvas)

Sea Port at Sunset, 1639 (oil on canvas)
XIR90066 Sea Port at Sunset, 1639 (oil on canvas) by Claude Lorrain (Claude Gellee) (1600-82); 103x137 cm; Louvre, Paris, France; (add.info.: Sea Port in the Sunset Sun; ); French, out of copyright

Background imageRelated Images Collection: British Prime Minister Winston Churchill V for victory salut

British Prime Minister Winston Churchill V for victory salut
British Prime Minister Winston Churchill making his V for victory salute

Background imageRelated Images Collection: Sport Fishing: Walleye Striking a Lure, 1950 (colour litho)

Sport Fishing: Walleye Striking a Lure, 1950 (colour litho)
3036074 Sport Fishing: Walleye Striking a Lure, 1950 (colour litho) by American School, (20th century); (add.info.: Vintage illustration of a walleye (Sander vitreus) striking a fishermans lure


All Professionally Made to Order for Quick Shipping


-

Why Choose Us?

We are a leading provider of Art Prints and Photo Gifts since 2003, working in partnership with a range of Sporting Clubs, Charities, Museums and Picture Libraries. A large share of profits from any of their images will go directly towards supporting that charity or club. Our archive of images is carefully curated to bring you a wide range of subjects, including landscapes, wildlife, architecture, and more. We ship from our partner labs in the UK, USA, EU (Netherlands) and Australia.
+

How do I place an order?

Ordering is quick & easy - Just follow 5 Simple Steps:
  1. Find your image: Use our search box or browse our online photo Collections to find the image you want.

  2. Choose your print format: Select your desired product and add it to your cart.

  3. Enter your details: If you're a returning customer, simply enter your email address and password, and we'll fill in your billing and shipping address details. All personal details are held securely and are fully GDPR compliant. As standard, we remove all Personally Identifiable Information after 12 months.

  4. Pay for your purchase: We use state-of-the-art security for online shopping and do not have access to your card details.

  5. Sit back and relax: We'll email you confirmation of your order and when it's dispatched. Registered customers can also track orders in the 'My Account' area.

+

How do I pay for an order?

You can pay for your order with most of the major credit and debit cards, or PayPal. For added security, major financial institutions process payment details separately and securely on our behalf. We do not have access to your online payment card details. Online payments are preferred however we do take phone orders. For UK customers only we accept cheques issued against a UK bank.
+

Is my data safe?

We take data security very seriously. We do not have access to your full card details and all payments are requested over a fully secure connection. Additionally, we fully comply with current European and GDPR legislation, and automatically remove all personal data after at most 12 months (unless you have an account with us and have signed in recently). We also have a strict opt-in policy and would never sell your personal details. Your data is only used to fulfill your order promptly and efficiently.
+

Is wall art ready to hang?

For quick and easy installation all wall art, including framed prints, canvas prints and metal prints are supplied with a ready to hang solution on the back. Generally, saw tooth hangers are applied as they allow wall art to hang flush against the wall. The serrated edge of the hanger prevents the frame from shifting or tilting when hung.
+

Are the photo prints fade resistant?

Yes, we use archival quality photo paper photographic paper for vivid reproduction Prints are an accurate representations of the original artwork, which is preserved for artistic character and authenticity. We guarantee they match previews shown on our web site